Products &
Stock Management
Everything you sell starts as a product. This guide shows you how to add one, change it later, and keep your stock count accurate as new shipments arrive or items go missing.
- 1. Add a product
- 2. Edit a product
- 3. Turn on stock tracking
- 4. Open Manage Stock
- 5. Record a restock
- 6. Record an adjustment
- 7. How orders affect stock
Add a product
From the Products tab, tap the + Add Product button. Fill in two things and you're done:
- Product Name — what you call it (e.g. Demo T-Shirt).
- Sale Price — the price your customer pays, in Kyat.
Everything else is optional:
- Image — add a photo so it's easy to spot in the list (PNG or JPG, up to 5MB).
- Stock tracking — turn this on if you want the app to count how many you have left.
- Discount — apply a percentage off, either always-on or for a set number of days.
Tap Save and the product appears in your list, ready to use in orders.
 The Add / Edit Product form
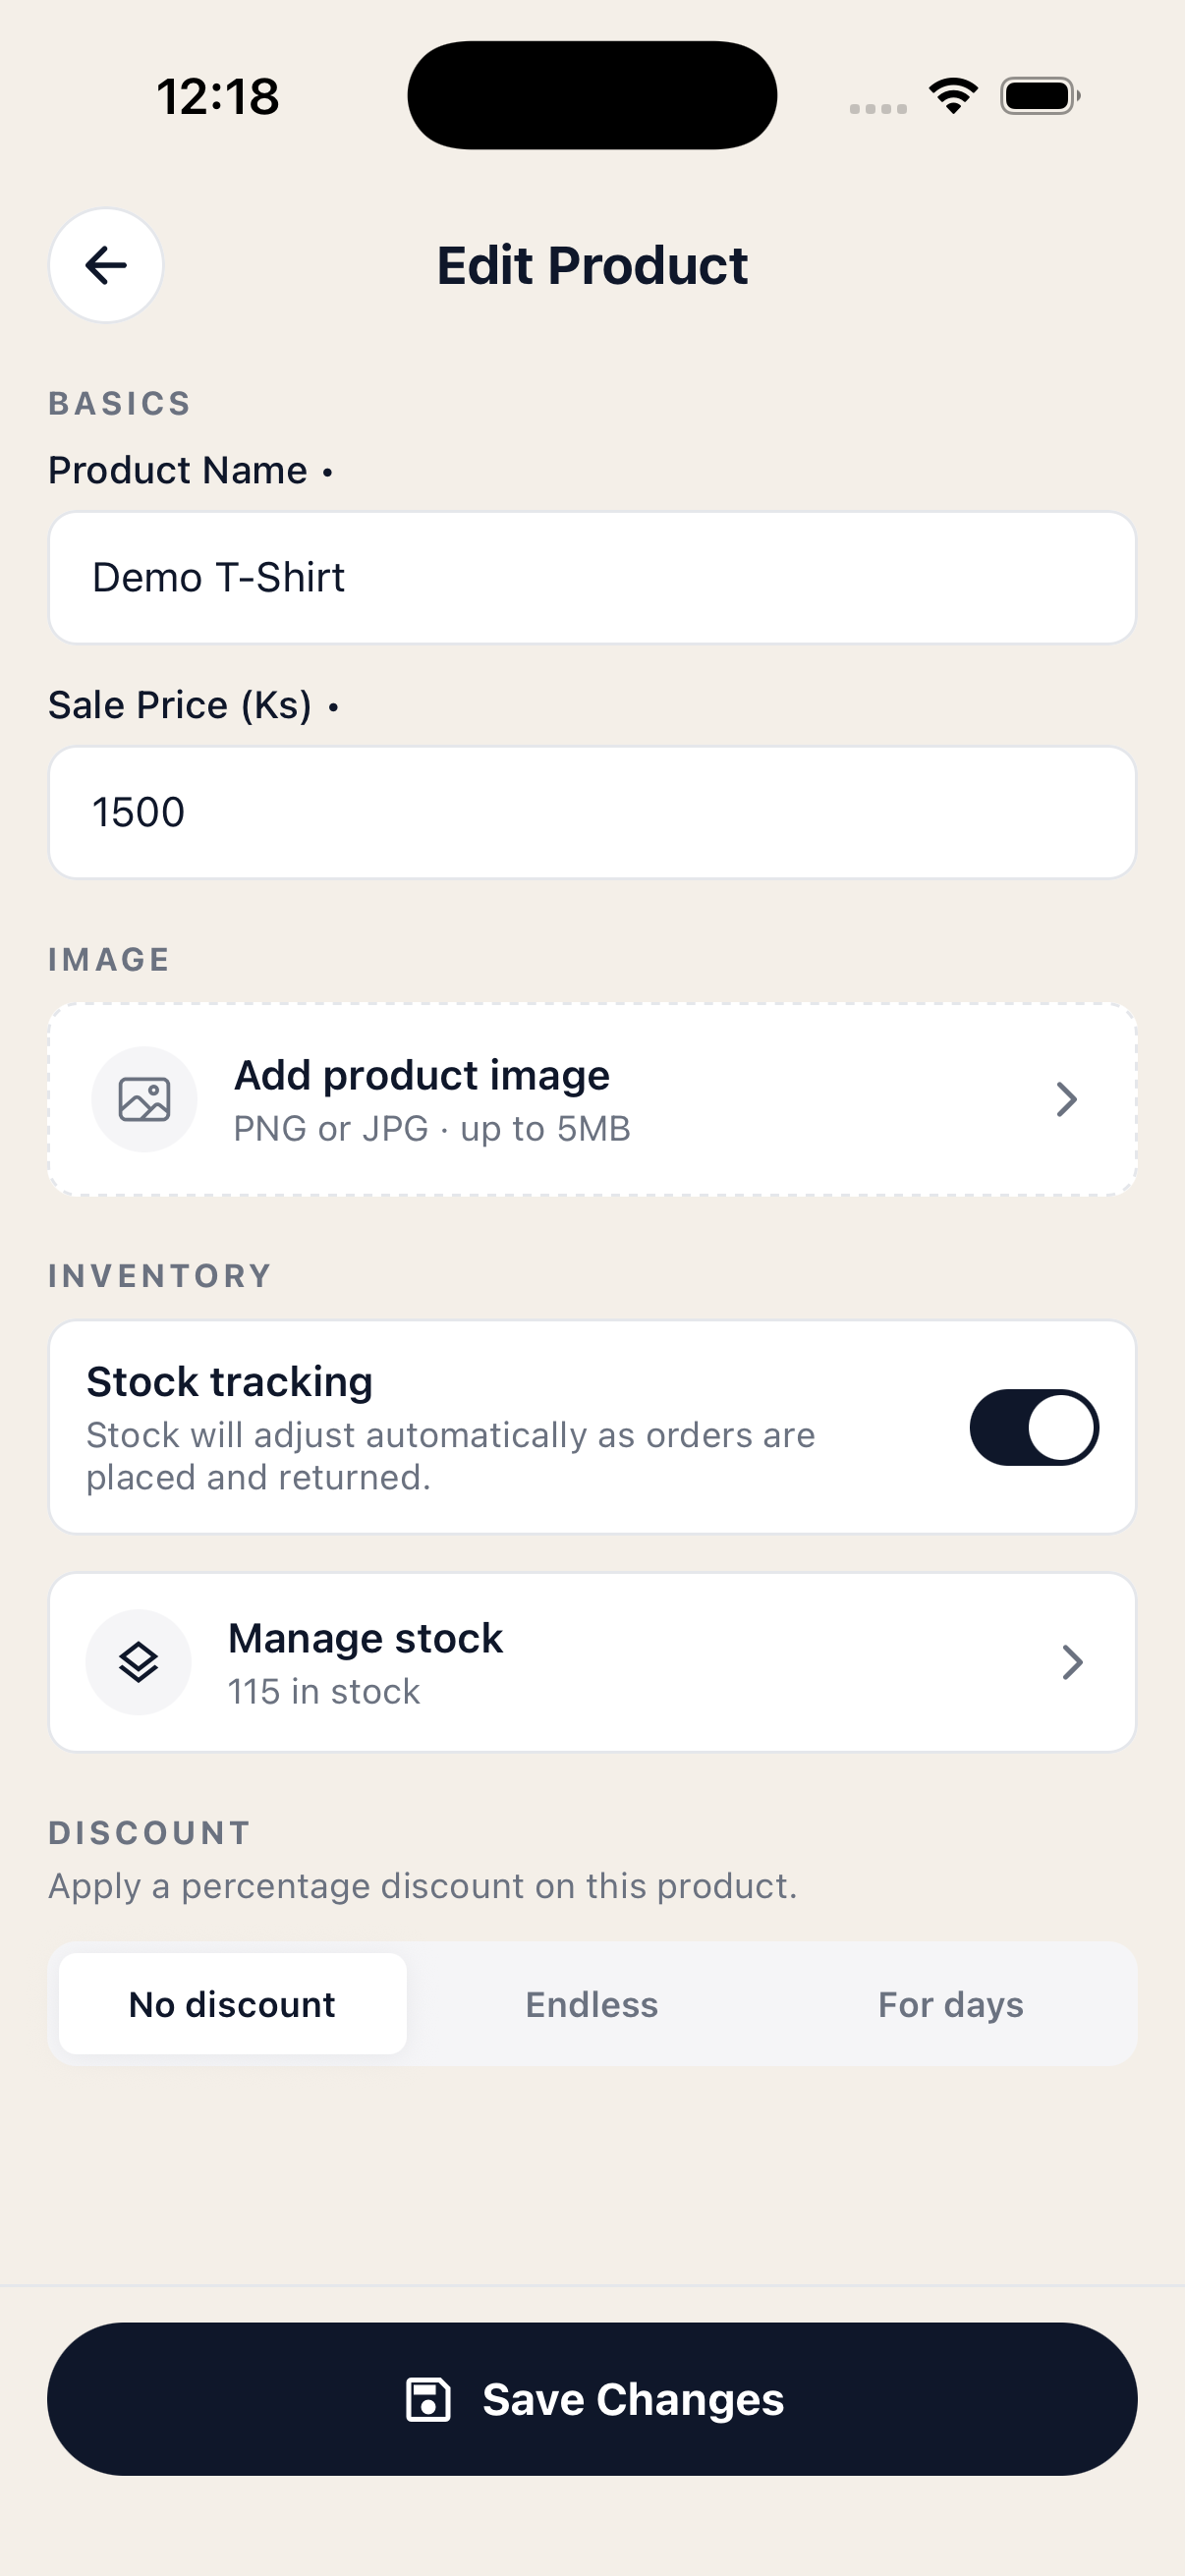
Edit a product
Tap any product in the list to open it, then tap the pencil / edit icon. You'll see the same form you used to create it. From here you can:
- Change the name or sale price.
- Add, replace, or remove the image.
- Turn stock tracking on or off.
- Set or remove a discount.
You won't change your stock count from this screen. To record new arrivals or losses, use Manage stock — covered in the next steps.
Tap Save Changes when you're done.
Edit Product — same form as Add
Turn on stock tracking
Stock tracking is optional. If you turn it on for a product, the app will:
- Show you how many units are currently on hand.
- Subtract from that count automatically as orders are placed.
- Add back to the count if an order is cancelled or returned.
- Warn you when the product is running low or out of stock.
To enable it, open the product, scroll to Inventory, and switch Stock tracking on. A Manage stock button will appear right below it, showing the current count.
Tip: You don't need to track stock for every product. Use it for items where running out matters — turn it off for services or made-to-order items.
Stock tracking on — 115 in stock
Open Manage stock
From the product's edit screen, tap Manage stock. This opens the inventory screen, which has two tabs:
- Restocks — every time you received more inventory, with the price you paid and how many of that batch are still left.
- Adjustments — every time stock went down for a reason that wasn't a sale (damage, loss, theft, expiry, or a count correction).
The big number at the top — "115 in stock" in the screenshot — is your live count. It updates whenever you record a restock, an adjustment, or an order.
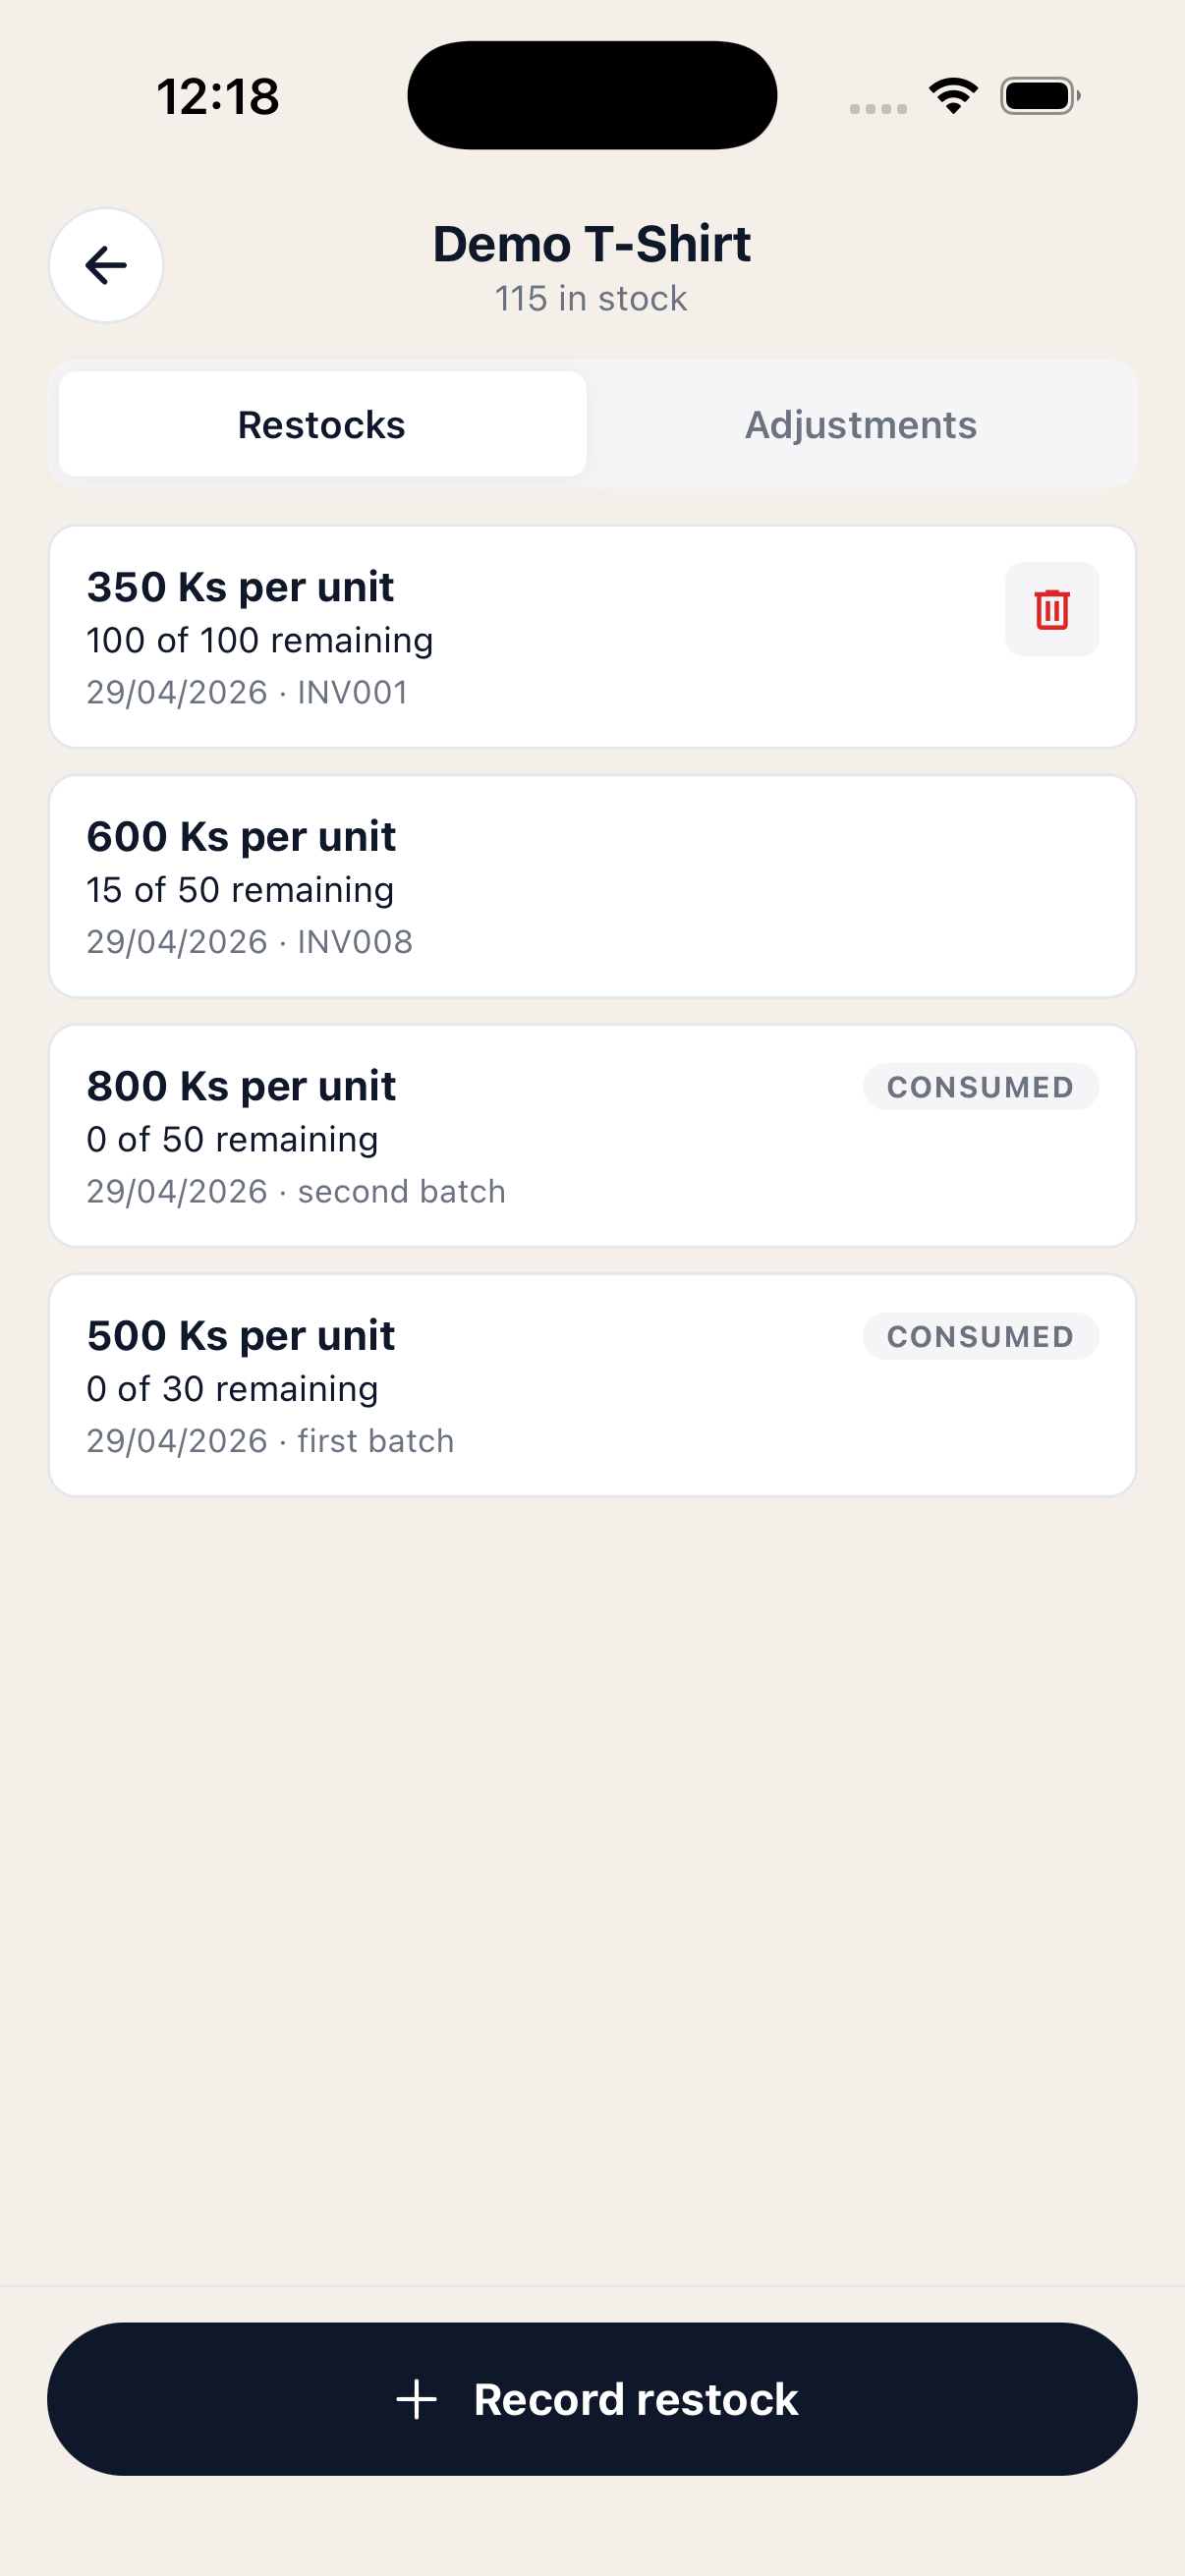 Manage stock — Restocks tab
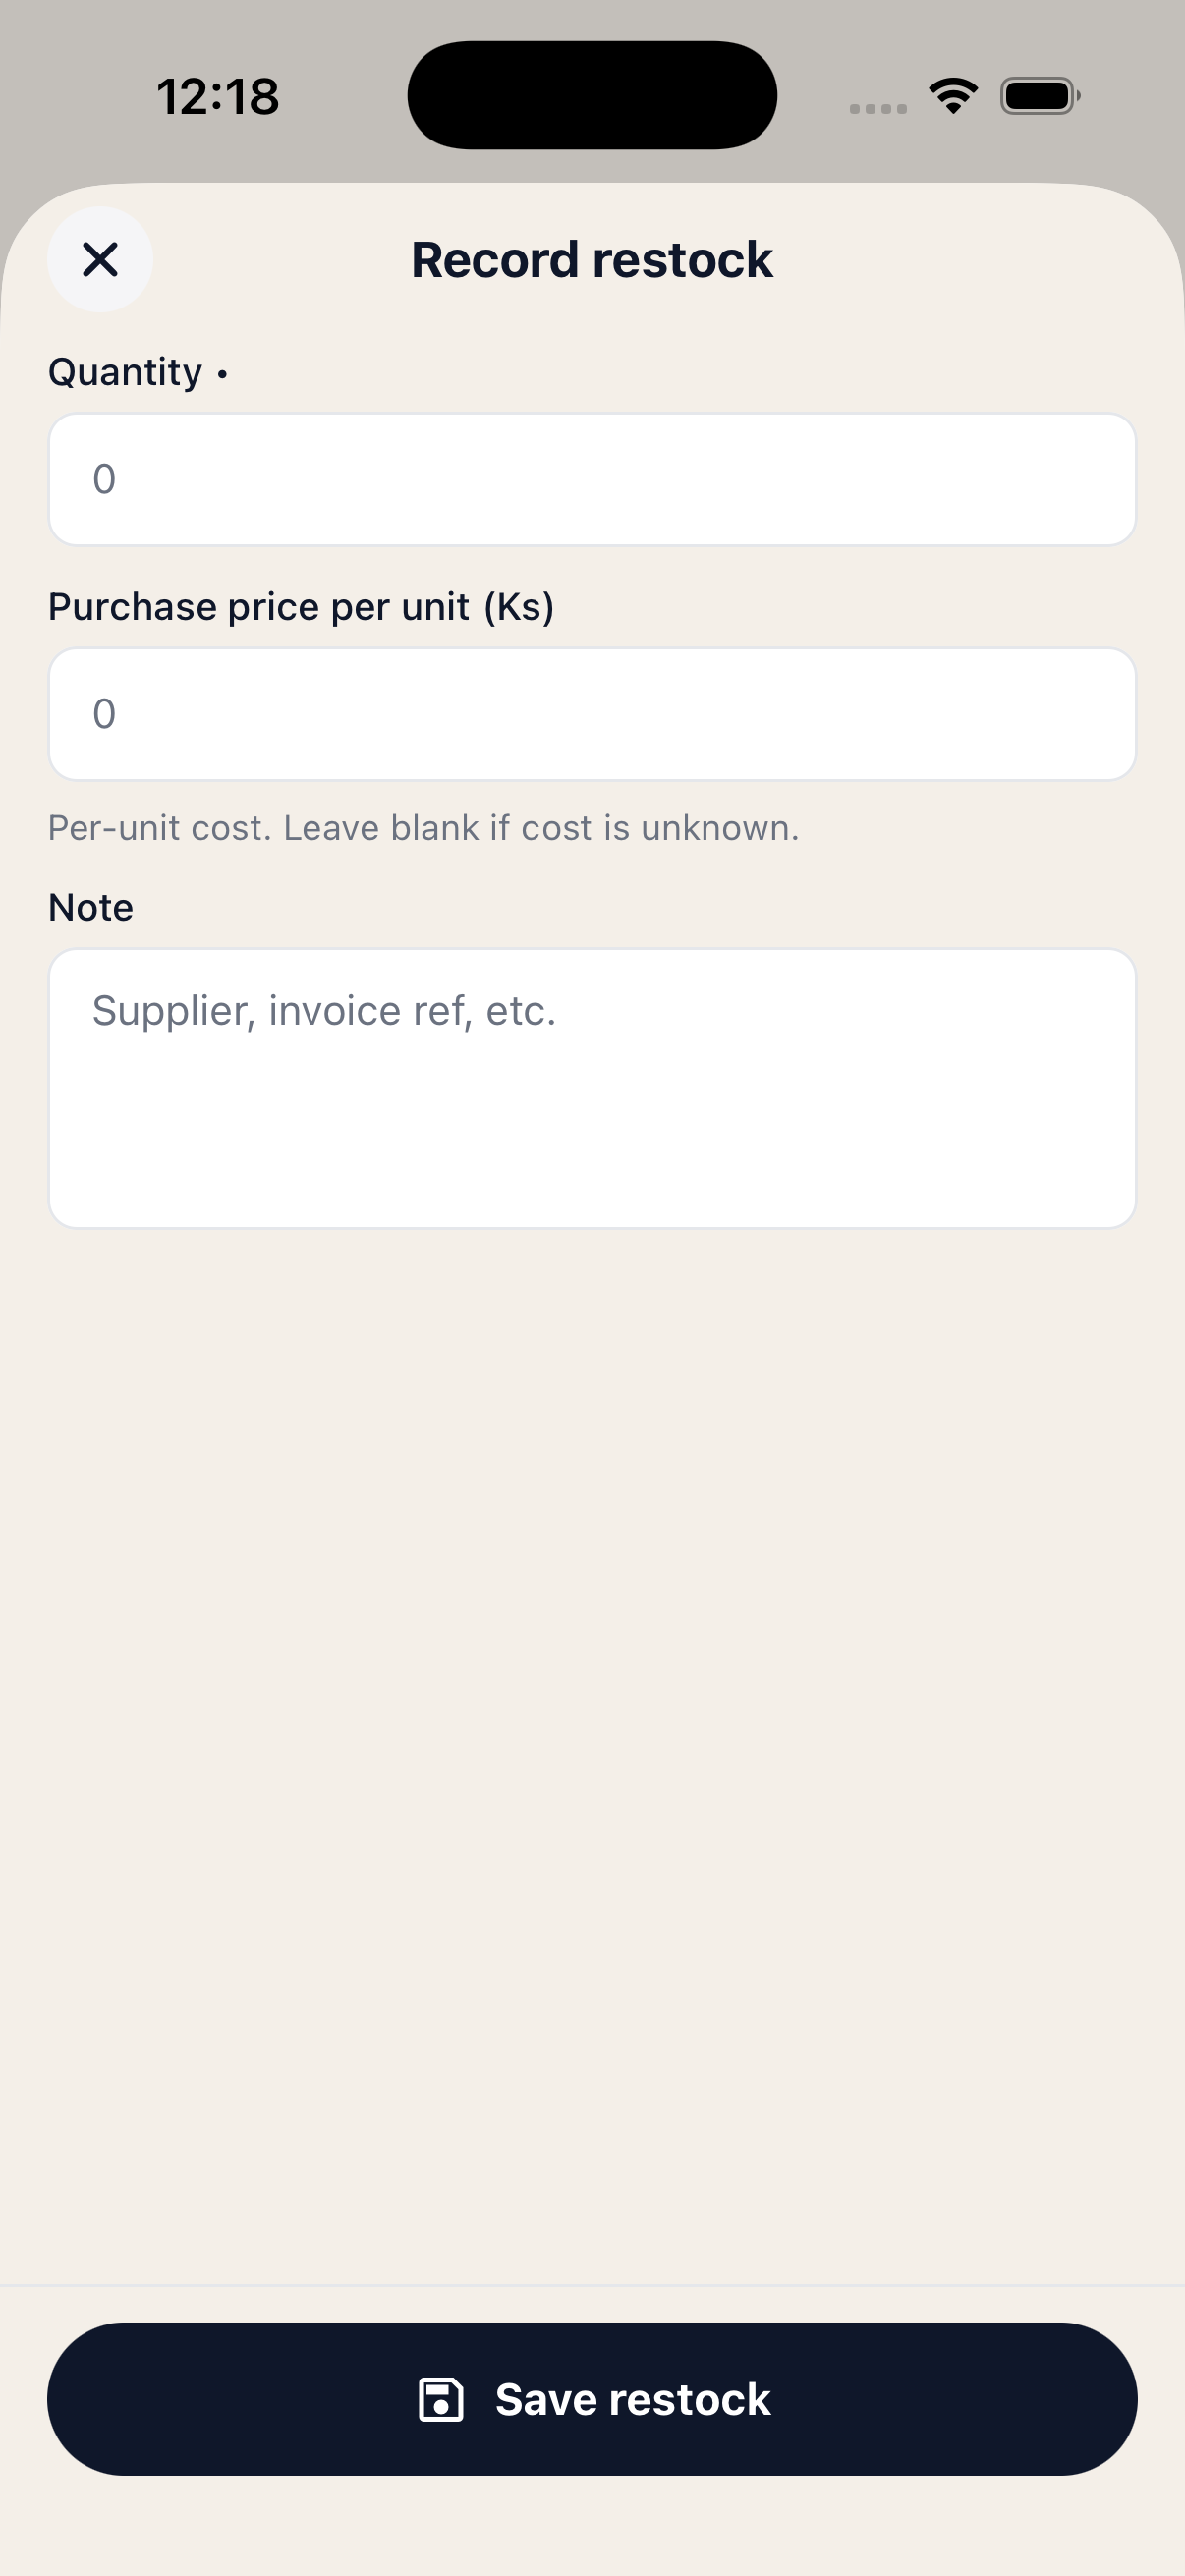
Record a restock
Use a restock any time more inventory arrives — a delivery from a supplier, a re-order, an in-house batch, anything that adds units to your shelf.
On the Restocks tab, tap + Record restock. You'll see three fields:
- Quantity — how many units arrived. Required.
- Purchase price per unit — what you paid per piece. Leave blank if you don't know it.
- Note — optional. Use it for a supplier name, an invoice number, or a batch label.
Tap Save restock. Your stock count goes up by the quantity, and a new batch appears in the list. Each batch shows how many of those units are still remaining — when a batch is fully sold, it's marked Consumed.
Why this matters: Recording the purchase price lets the app calculate your profit on each sale. If you skip it, you'll still have an accurate stock count — you just won't get cost-based reports for those units.
 Record restock form
Saved batches with remaining counts
Record restock form
Saved batches with remaining counts
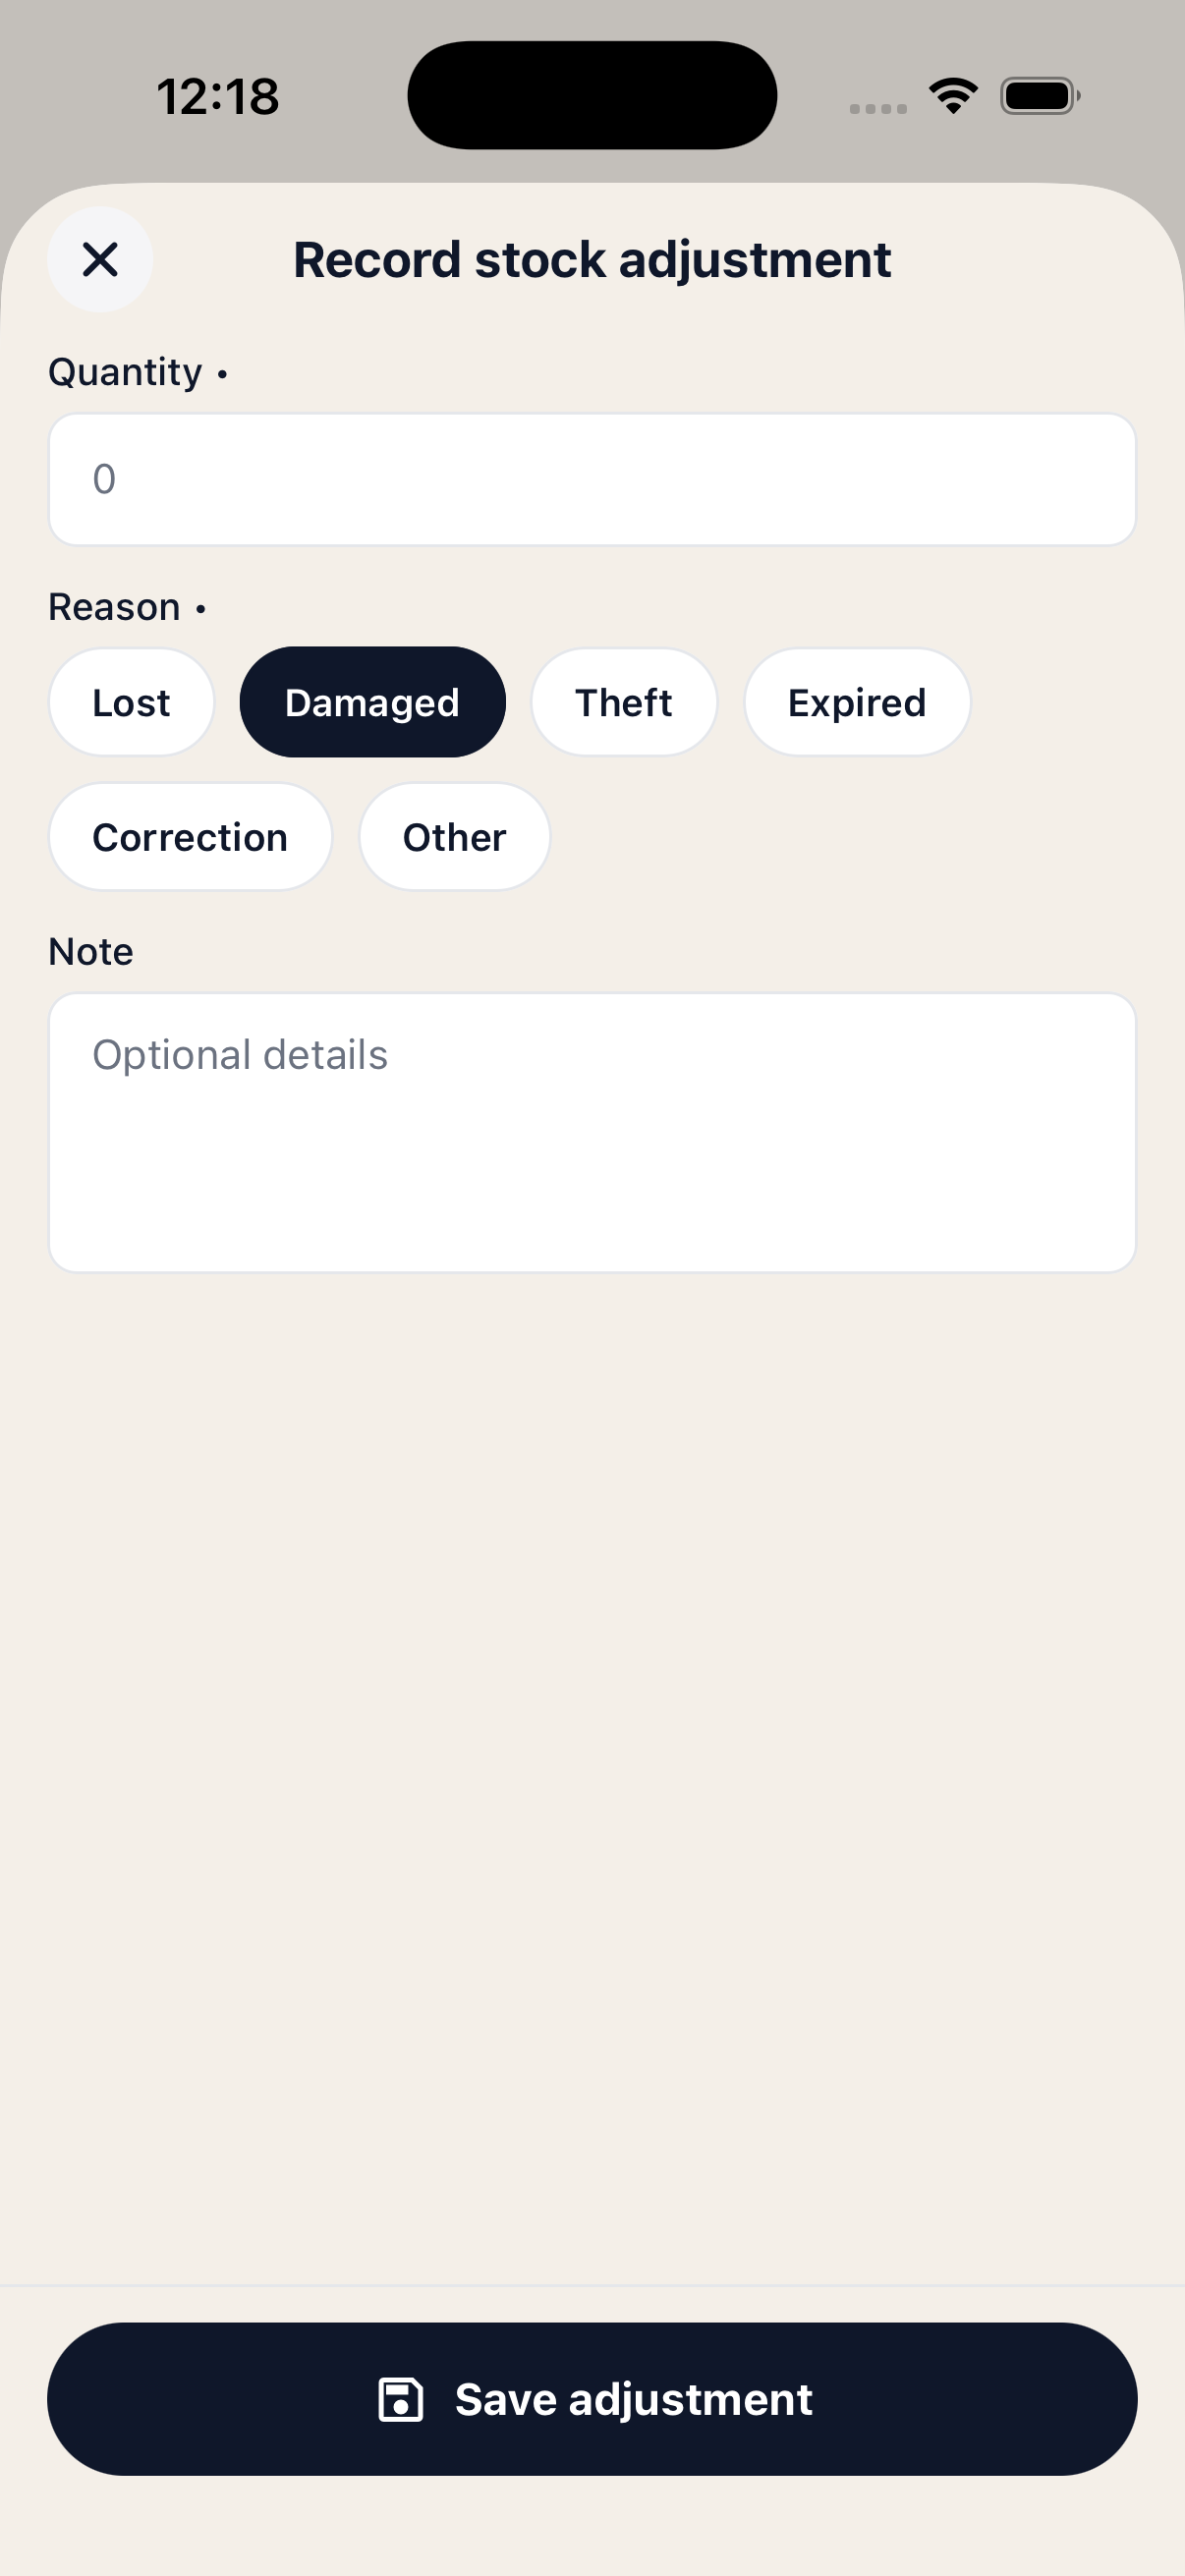
Record an adjustment
Use an adjustment whenever stock goes down for a reason that isn't a sale. For example: a box was damaged on arrival, a few pieces got lost, items expired, or your physical count doesn't match the app's count.
Switch to the Adjustments tab and tap + Record adjustment. Fill in:
- Quantity — how many units to remove. Required.
- Reason — pick one: Lost, Damaged, Theft, Expired, Correction, or Other. Required.
- Note — optional details, e.g. "water damage" or "shop count was 110, app showed 115".
Tap Save adjustment. Your stock count goes down by that quantity, and the entry shows up in the Adjustments list with the date, reason, and note.
Tip: Pick Correction when you do a physical count and find a difference — your app count instantly matches reality, with a record of the change in case you need to look it up later.
 Record adjustment form
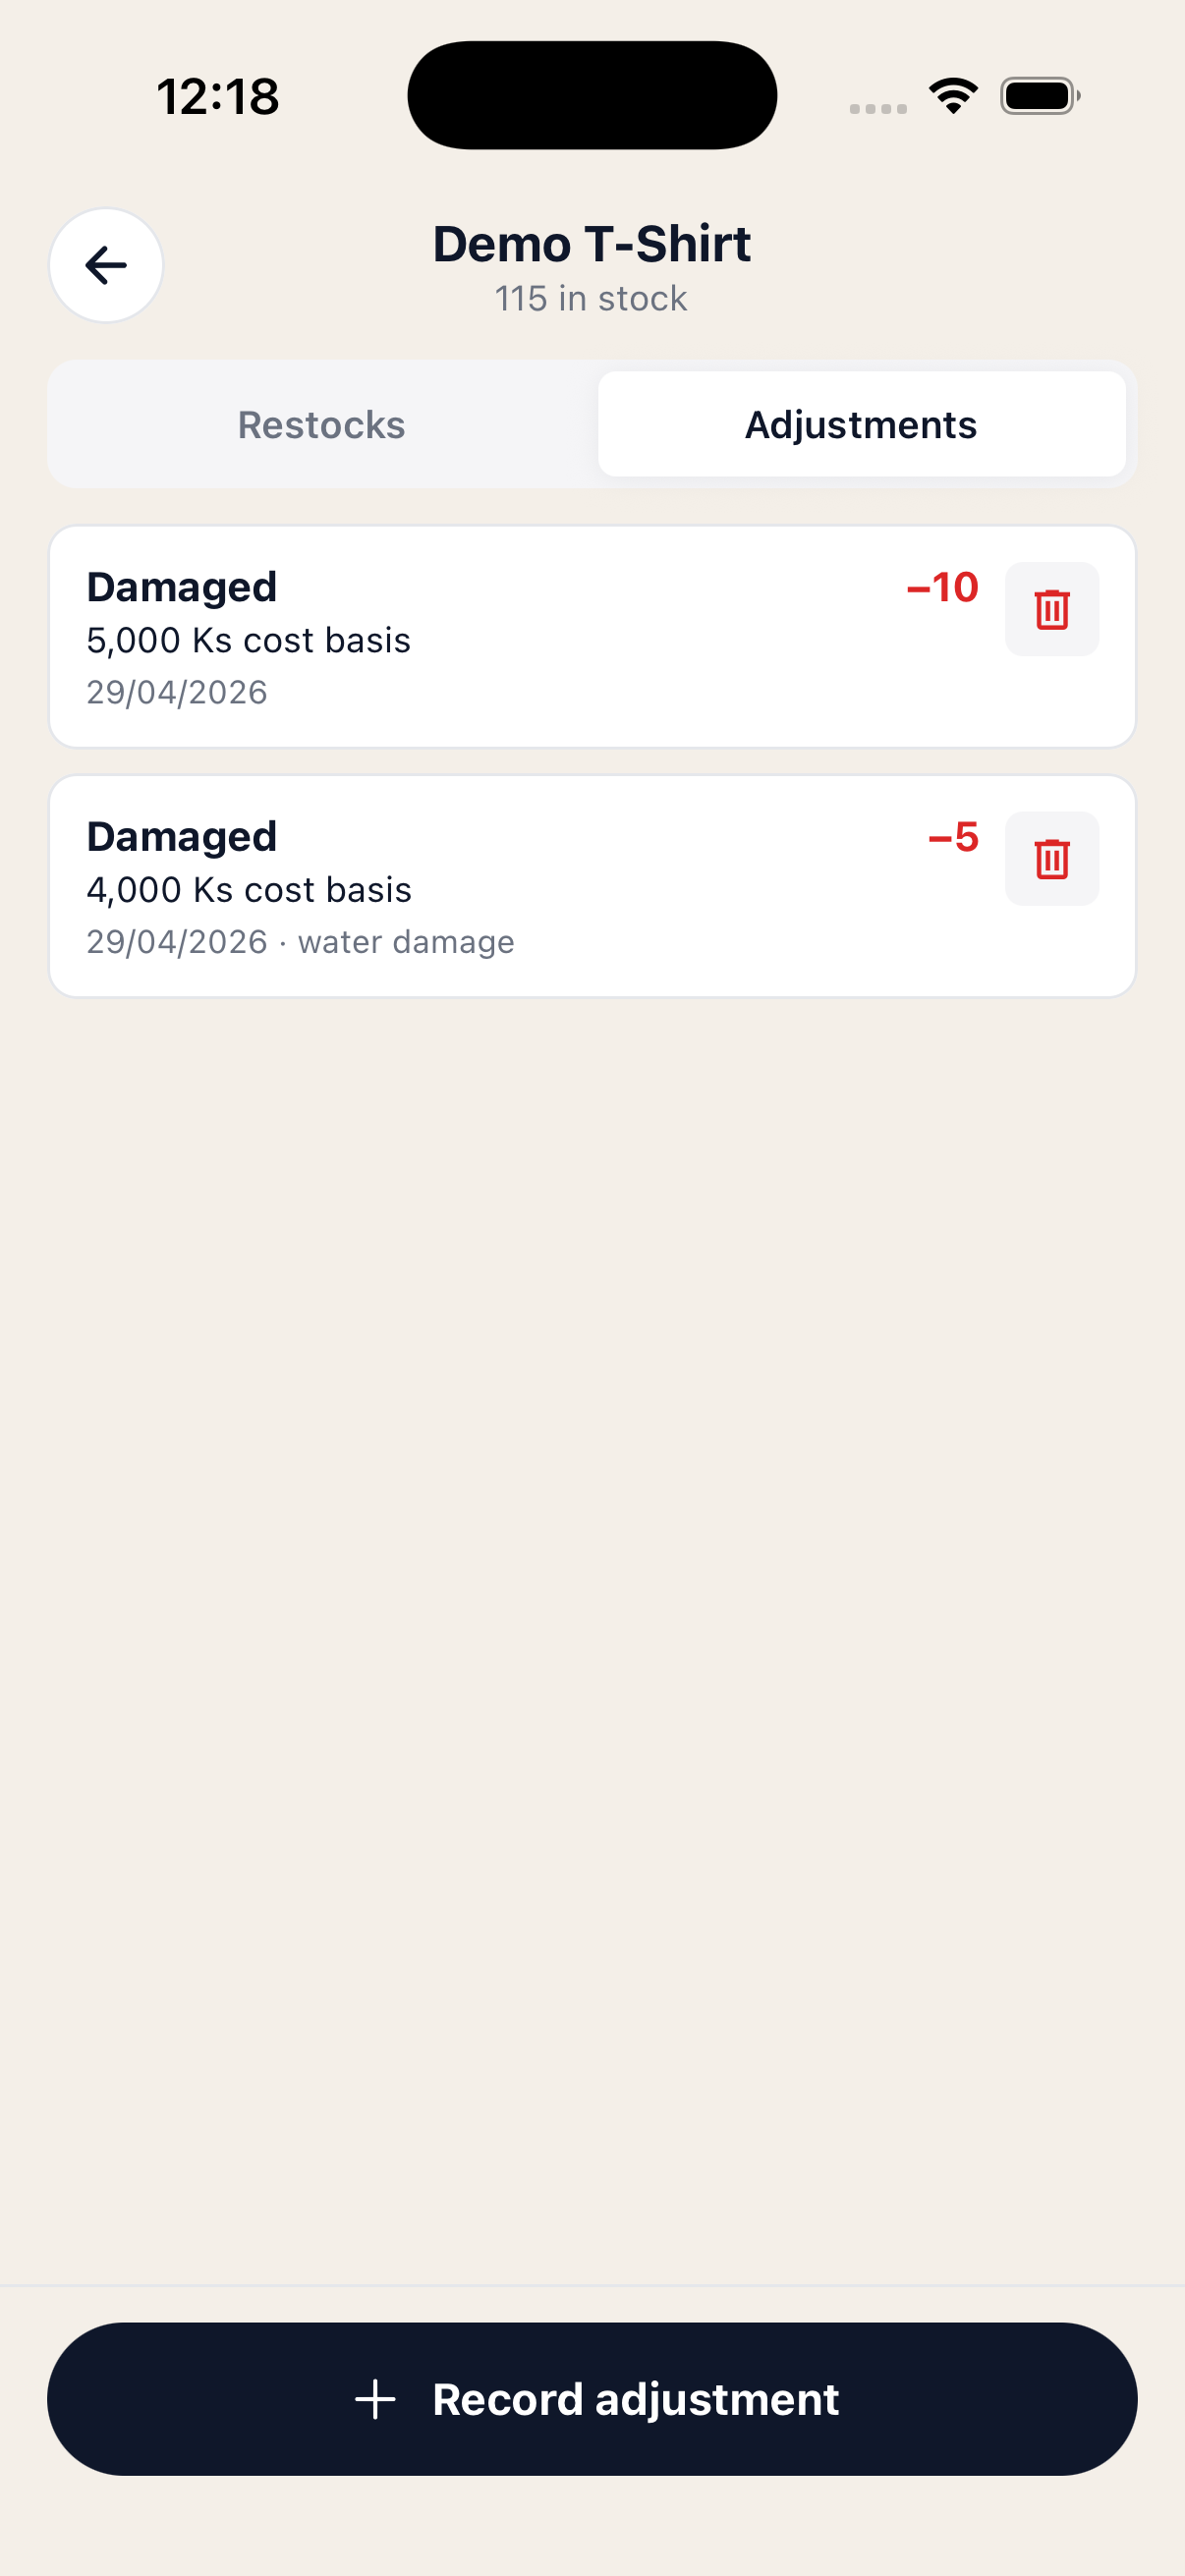 Adjustments history
How orders affect stock
You don't need to do anything to keep stock in sync with sales — the app handles it for you:
- When you create an order with a tracked product, its stock count goes down by the quantity sold.
- When you cancel or return that order, the stock count goes back up.
- If a product runs low or out, the product list shows a warning badge so you don't promise something you can't deliver.
Restocks add stock. Orders subtract stock. Adjustments fix anything in between. Together, those three actions keep your count honest.
That's it!
You now know how to add products, edit them, and keep stock counts accurate as your business moves. If you hit something that isn't covered here, message us on our Facebook page — we'll add it.
← Back to all tutorials