Creating &
Tracking Orders
Orders are the heart of the app. This guide walks you through writing one up, choosing how it'll be paid and delivered, then following it from "New" all the way to "Delivered" — with a printable receipt at the end.
- 1. Open the orders list
- 2. Start a new order
- 3. Add items
- 4. Set delivery details
- 5. Payment, discount & fees
- 6. Track and update an order
- 7. Edit, return & export receipt
Open the orders list
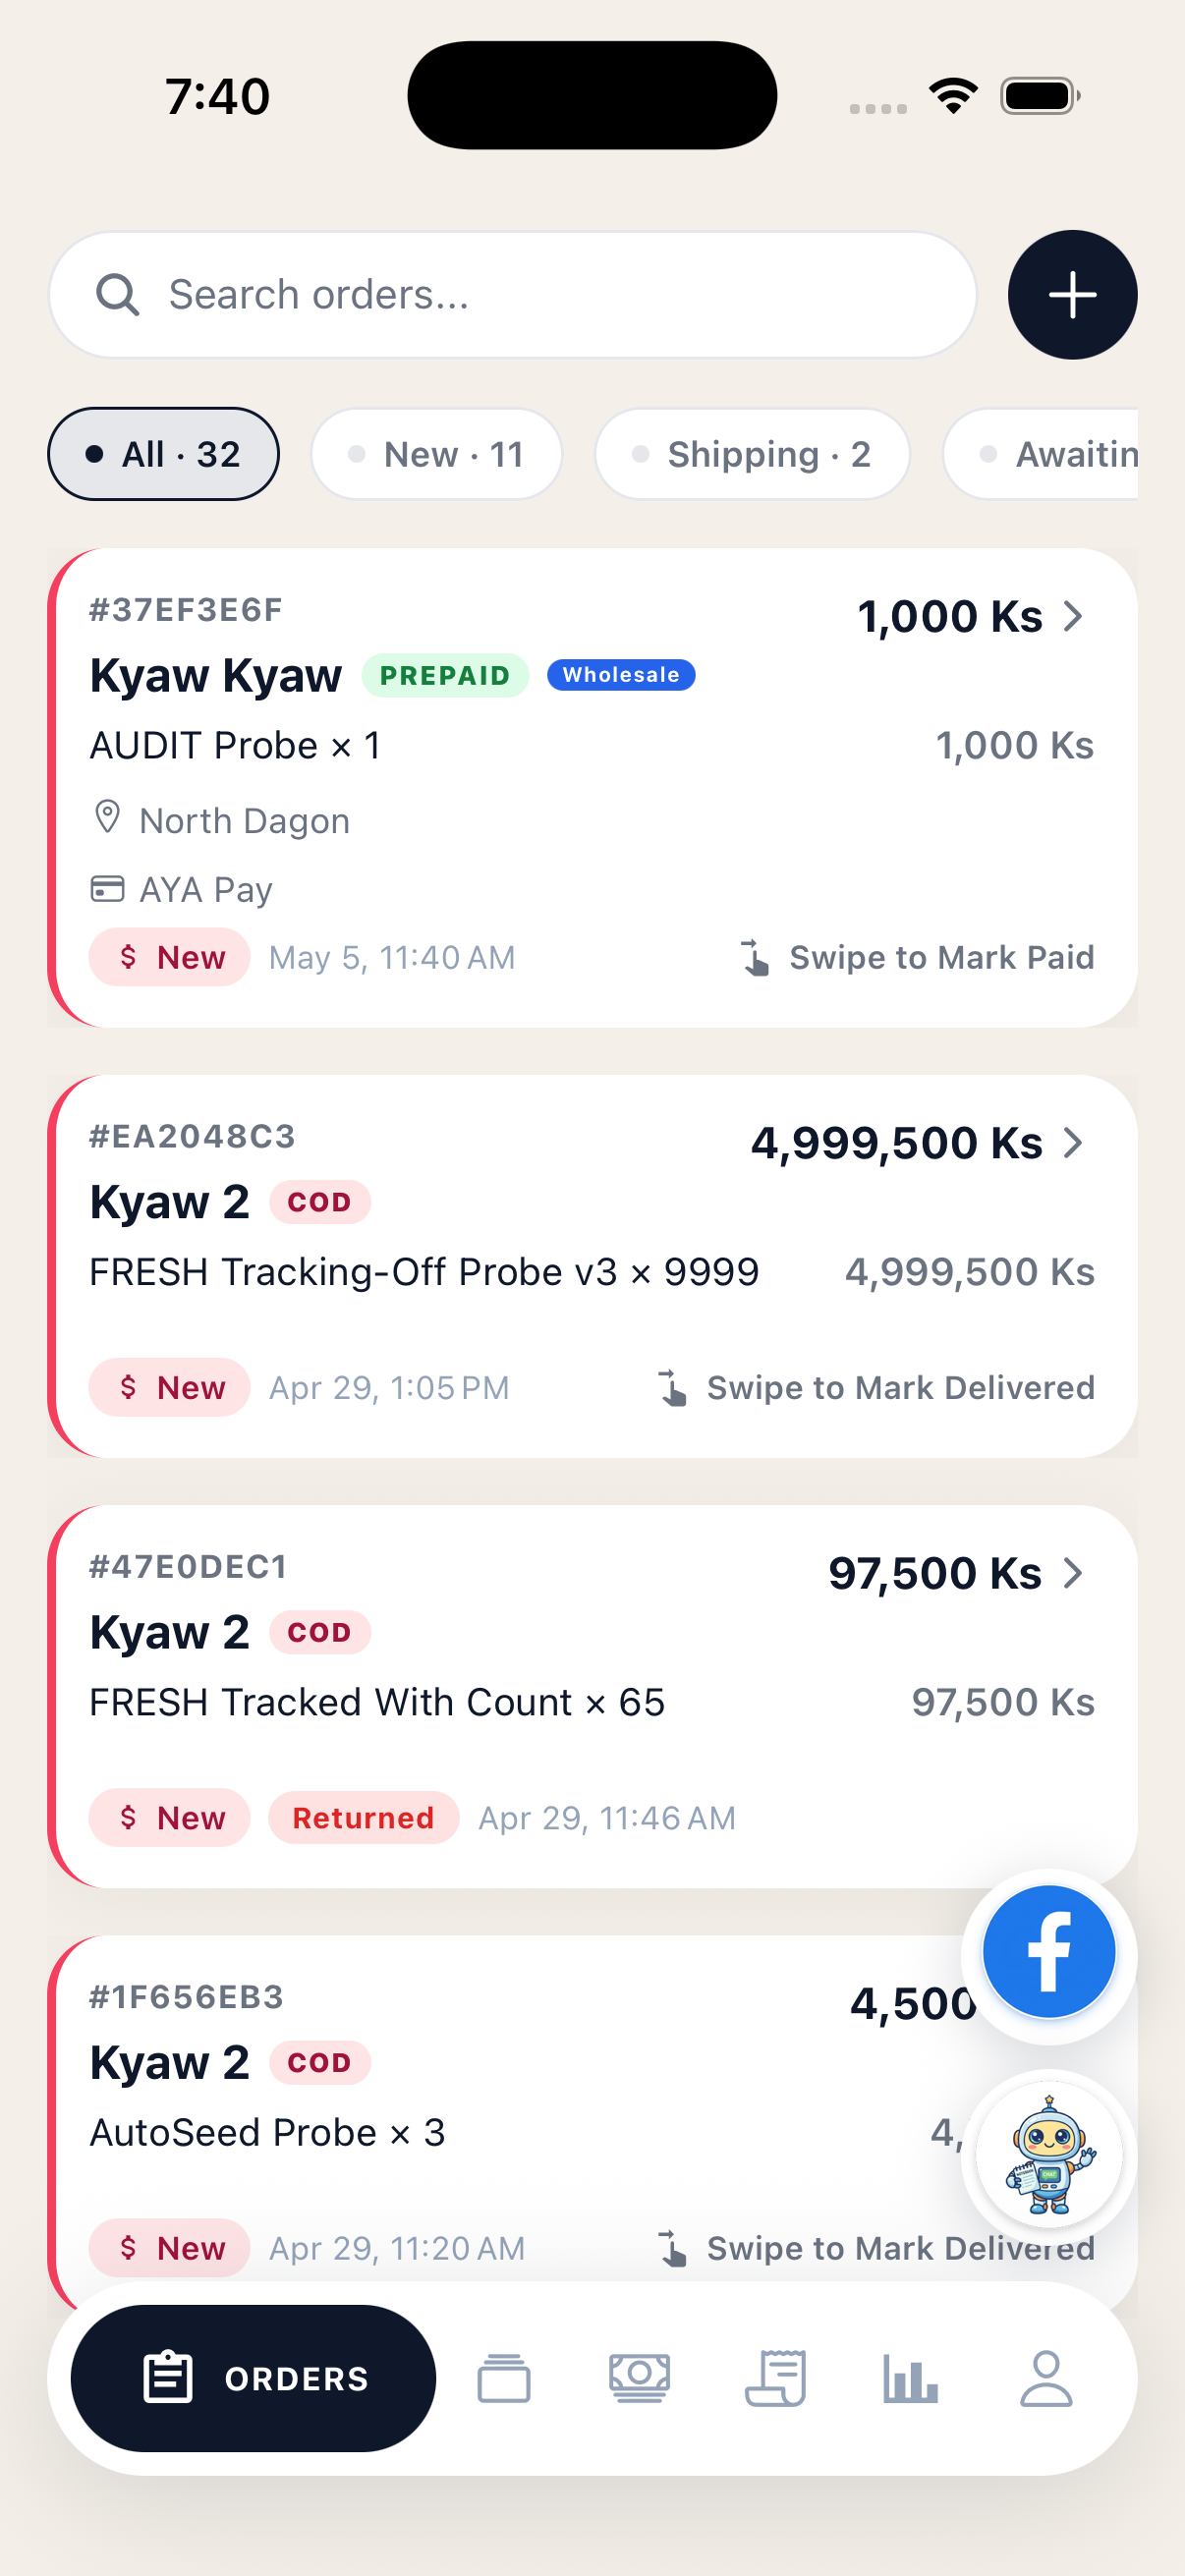
Tap the Orders tab at the bottom. This is your home base. Across the top you'll find a search box and the big black + button for adding a new order.
Right below sits a row of filter tabs. Each one shows a count so you can tell at a glance what needs your attention:
- New — orders you've just written up that haven't been paid or delivered yet.
- Shipping — paid orders that are with the courier and on their way.
- Awaiting Payout — Cash-on-Delivery orders where the courier has collected cash but hasn't paid you out yet.
- All — every order, newest first.
Each card shows the customer, total, items, delivery info and a status pill. Swipe right on a card to mark it Paid or Delivered without opening it. Tap a card to see the full order.
Tip: An overdue expected delivery date turns red on the card — a quick visual nudge to check in with the courier.
 Orders list with status tabs
Start a new order
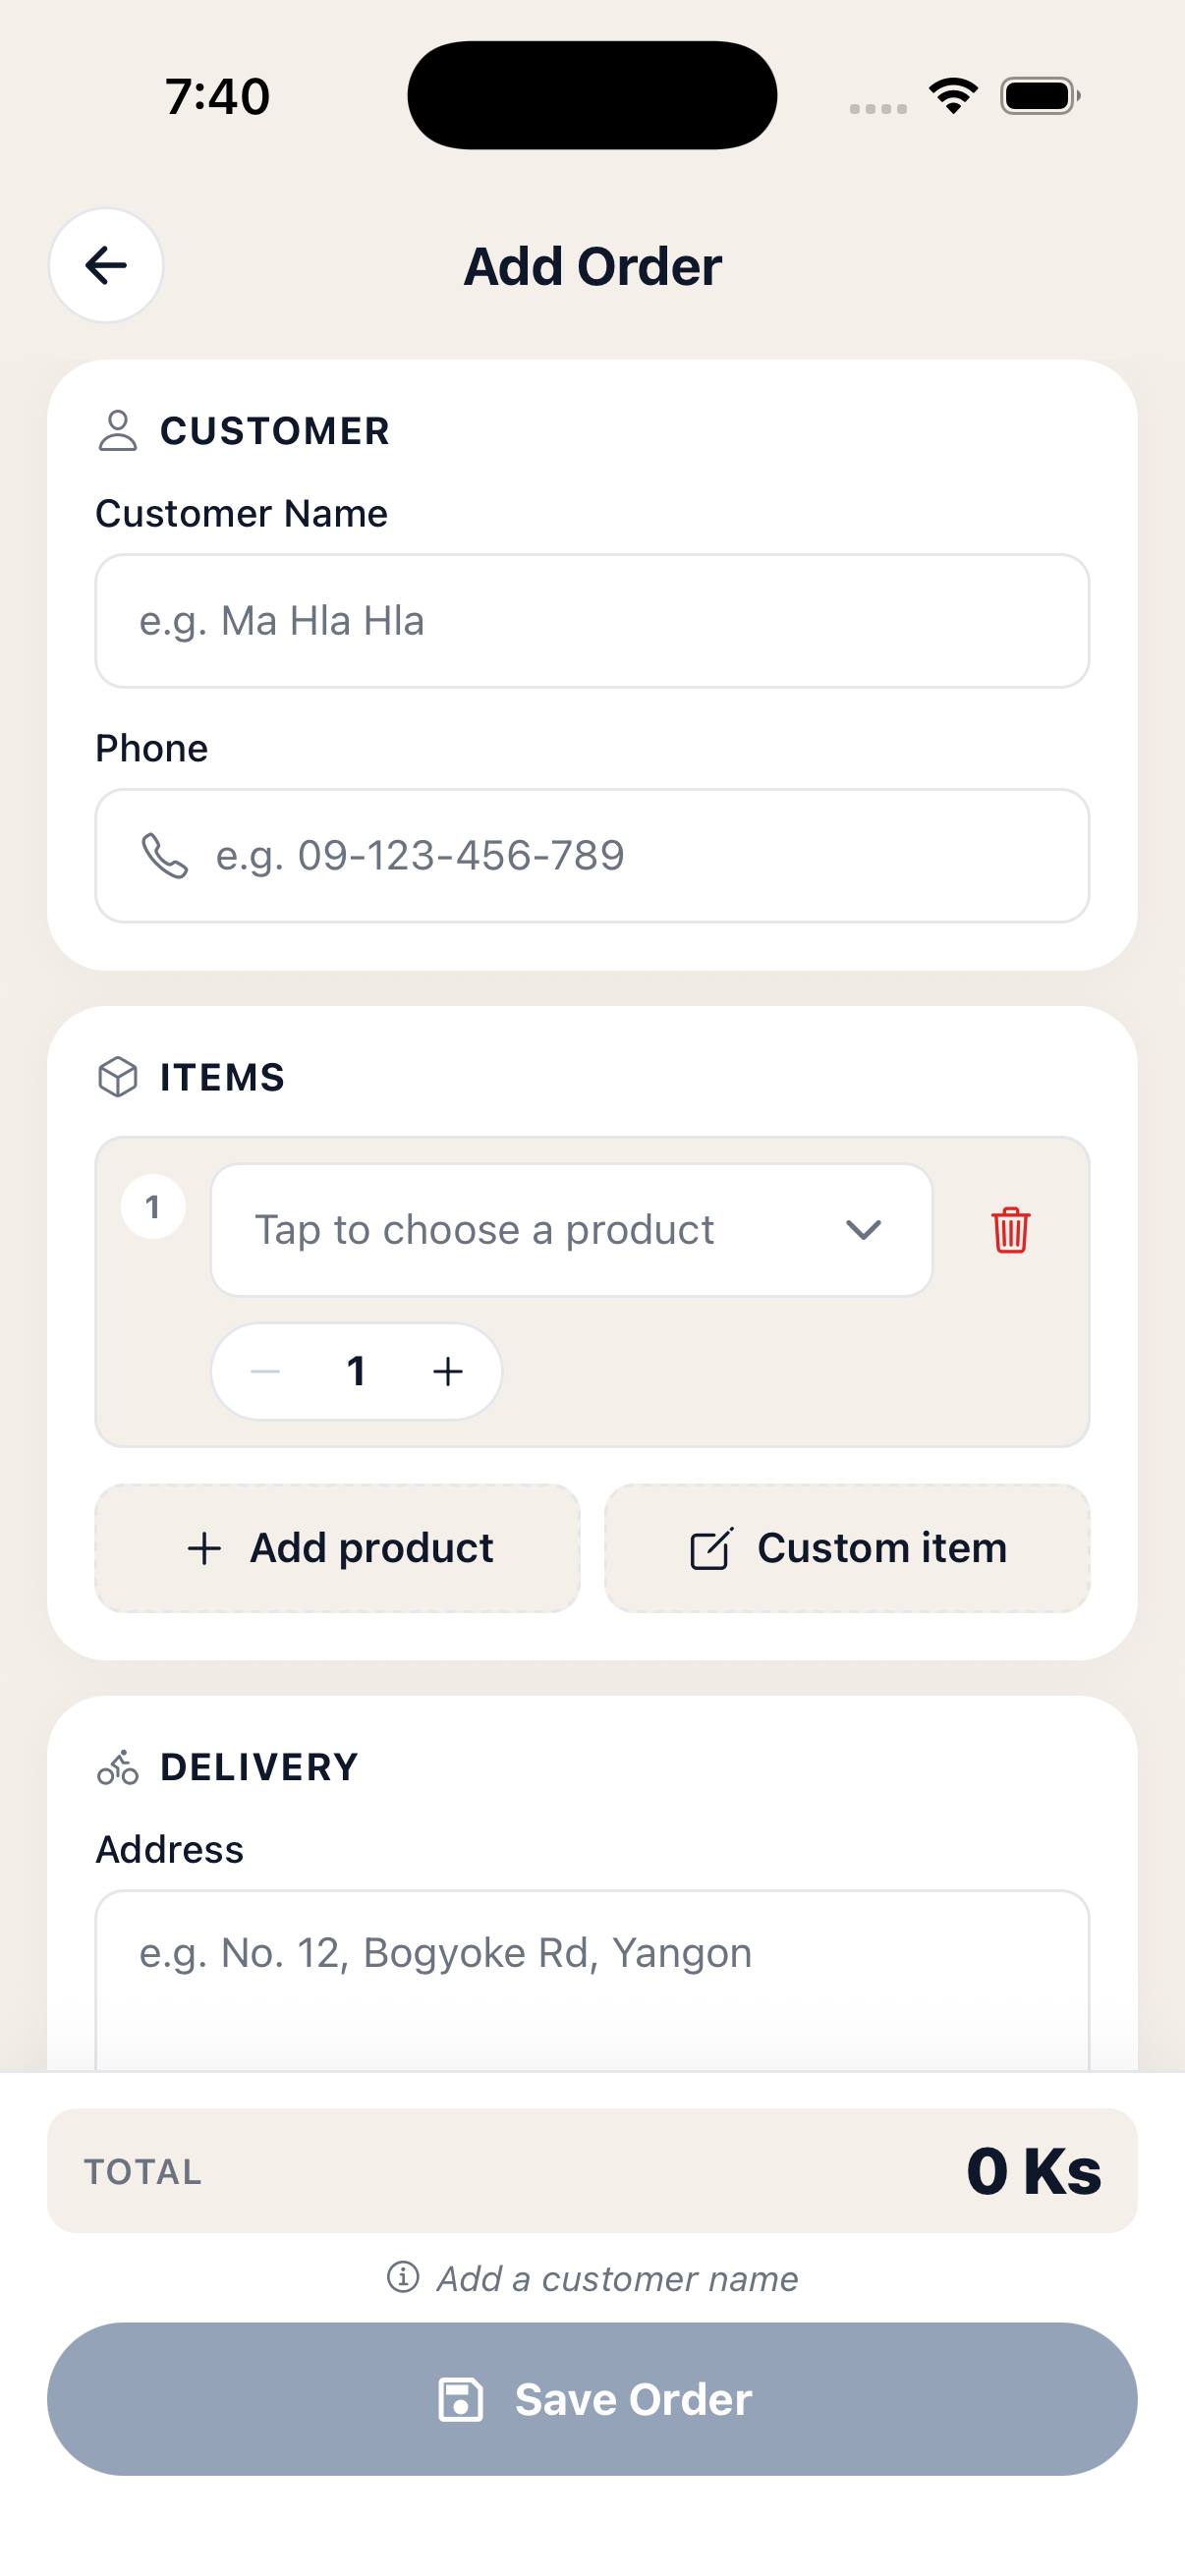
Tap the + button on the orders screen. This opens the Add Order form, which is one long page split into clear sections — Customer, Items, Delivery, Payment and Charges. You can fill them in any order.
First up is Customer:
- Customer Name — start typing and any saved customers with that name will pop up. Tap one to link the order to them; you'll see a small Saved customer chip and their phone, address and notes will fill in automatically.
- Phone — one number, or several separated by commas. The app shows a hint when it spots multiple numbers.
Don't have the customer saved yet? Just type their name. They'll be created when you save the order, and any address or note you fill in below will be saved on their record so you can re-use it next time.
 Customer section at the top of Add Order
Add items
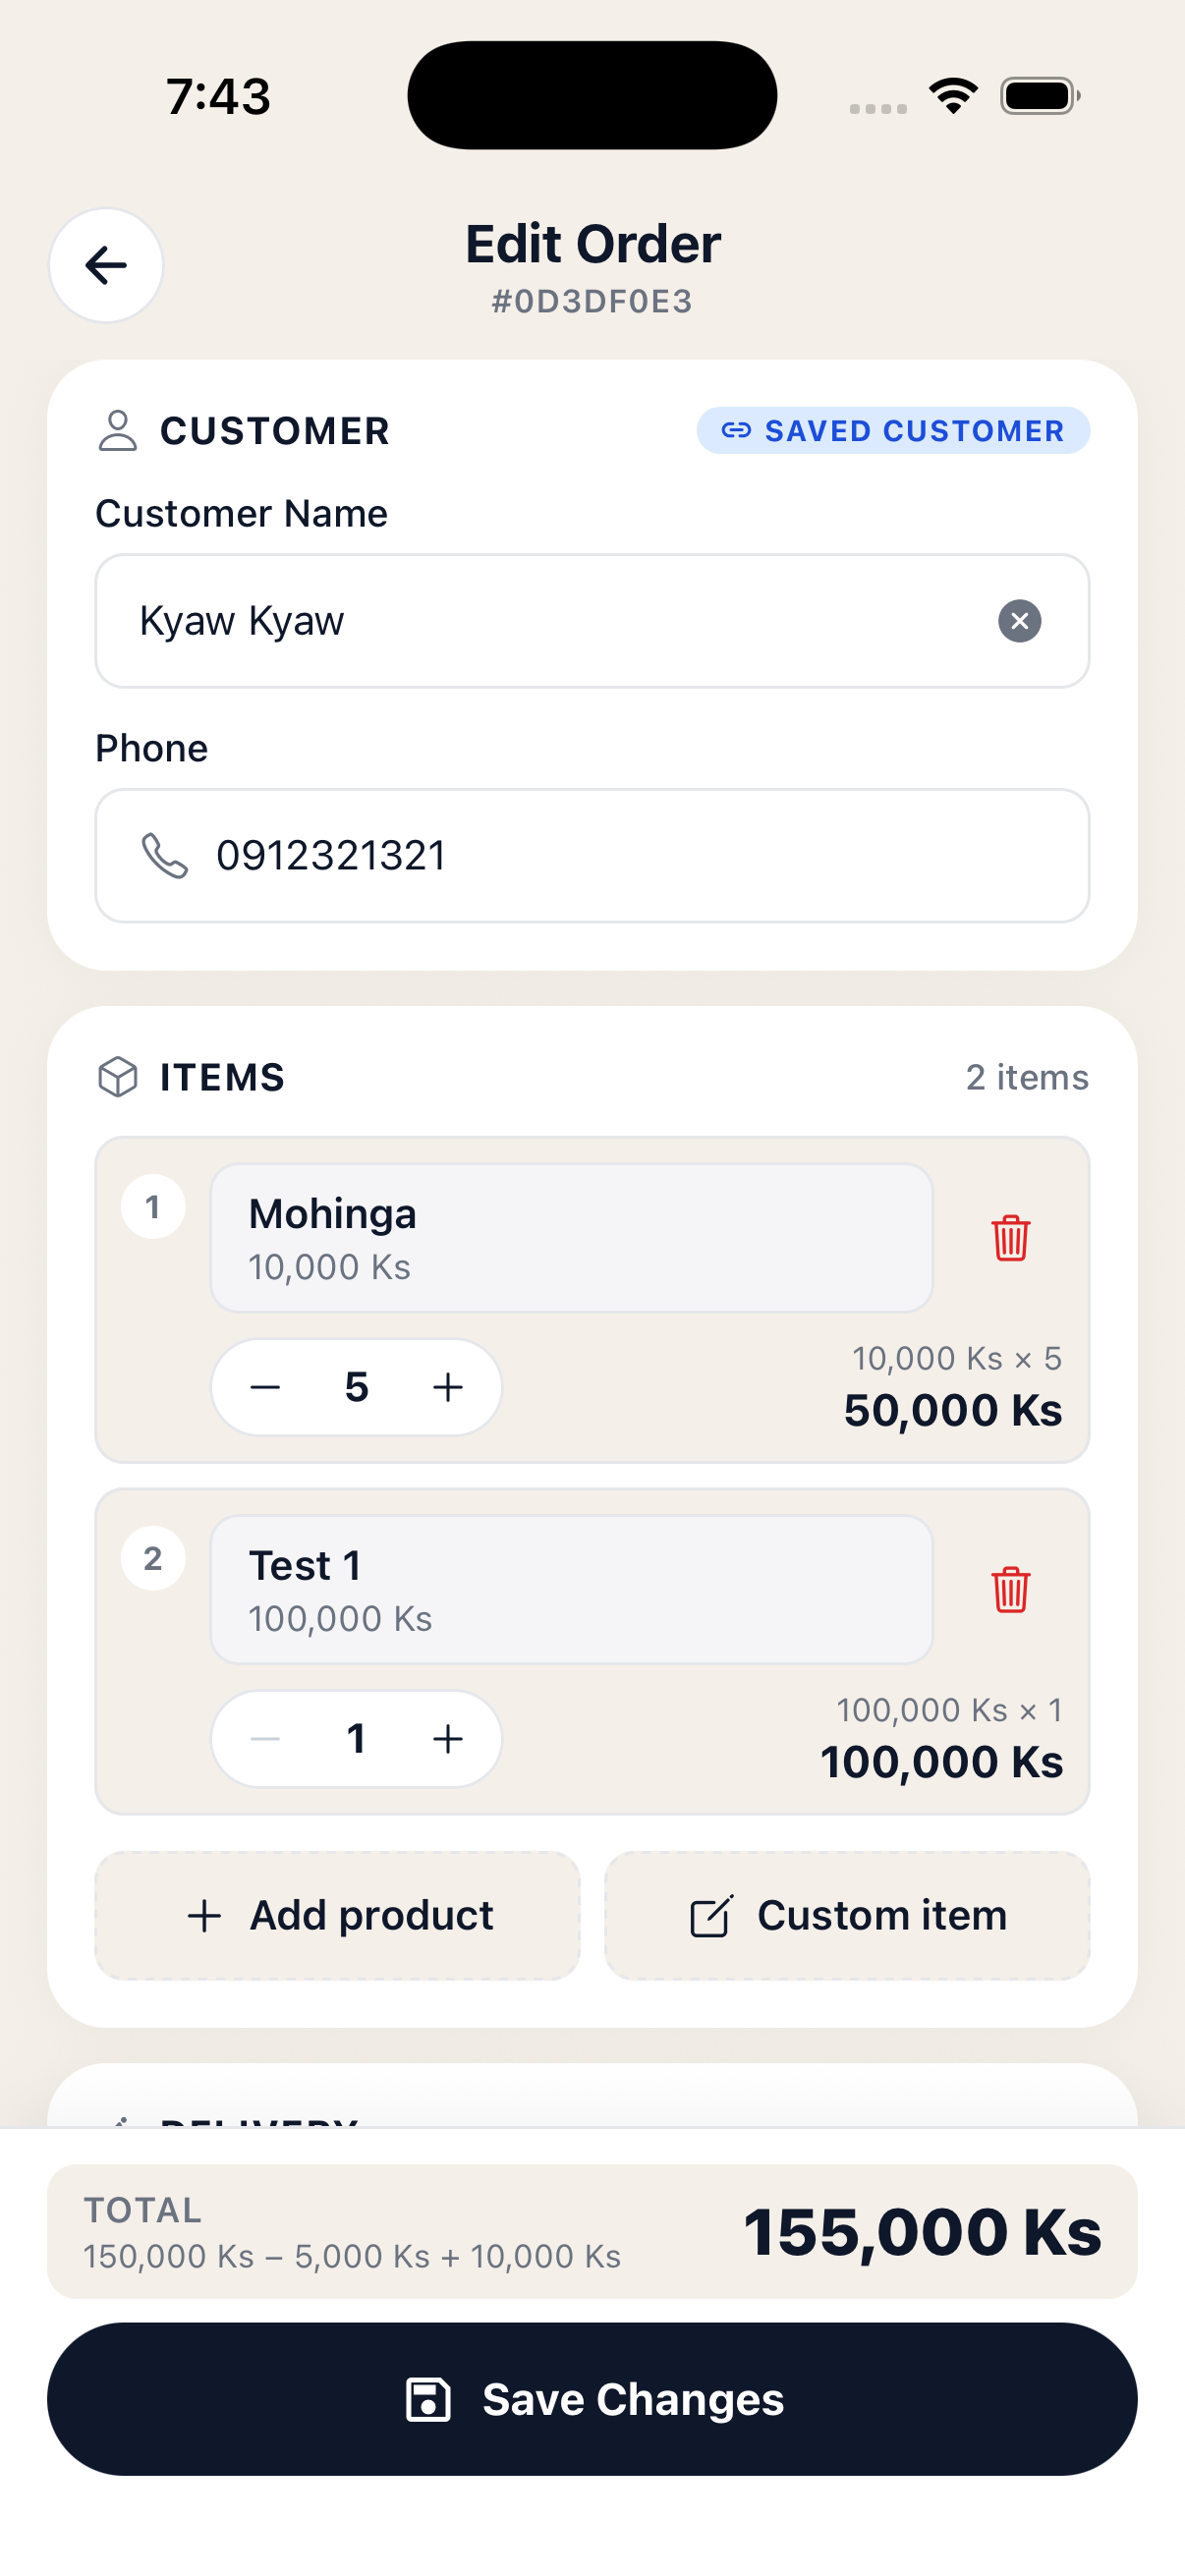
In the Items section you have two ways to add a line:
- + Add product — pick from your saved catalog. The dropdown shows the product image, name, price and any active discount. If a product is out of stock you'll see a red warning with a quick Restock shortcut to your inventory.
- + Custom item — type any name and price. Use this for one-off products you don't keep in the catalog.
Use the − / + stepper on each line to set the quantity. The line total updates live below it, and a running subtotal builds up at the bottom of the screen.
When you edit an existing order, items already linked to a catalog product show their name and price in grey — only the quantity is editable. This protects your records: if you need to change the product itself, swap the line out for a new one.
Tip: Try to exceed the stock you have on hand and the app warns you with a "Use N" shortcut that snaps the quantity back to what's actually available.
 Items list with quantity steppers and live totals
Set delivery details
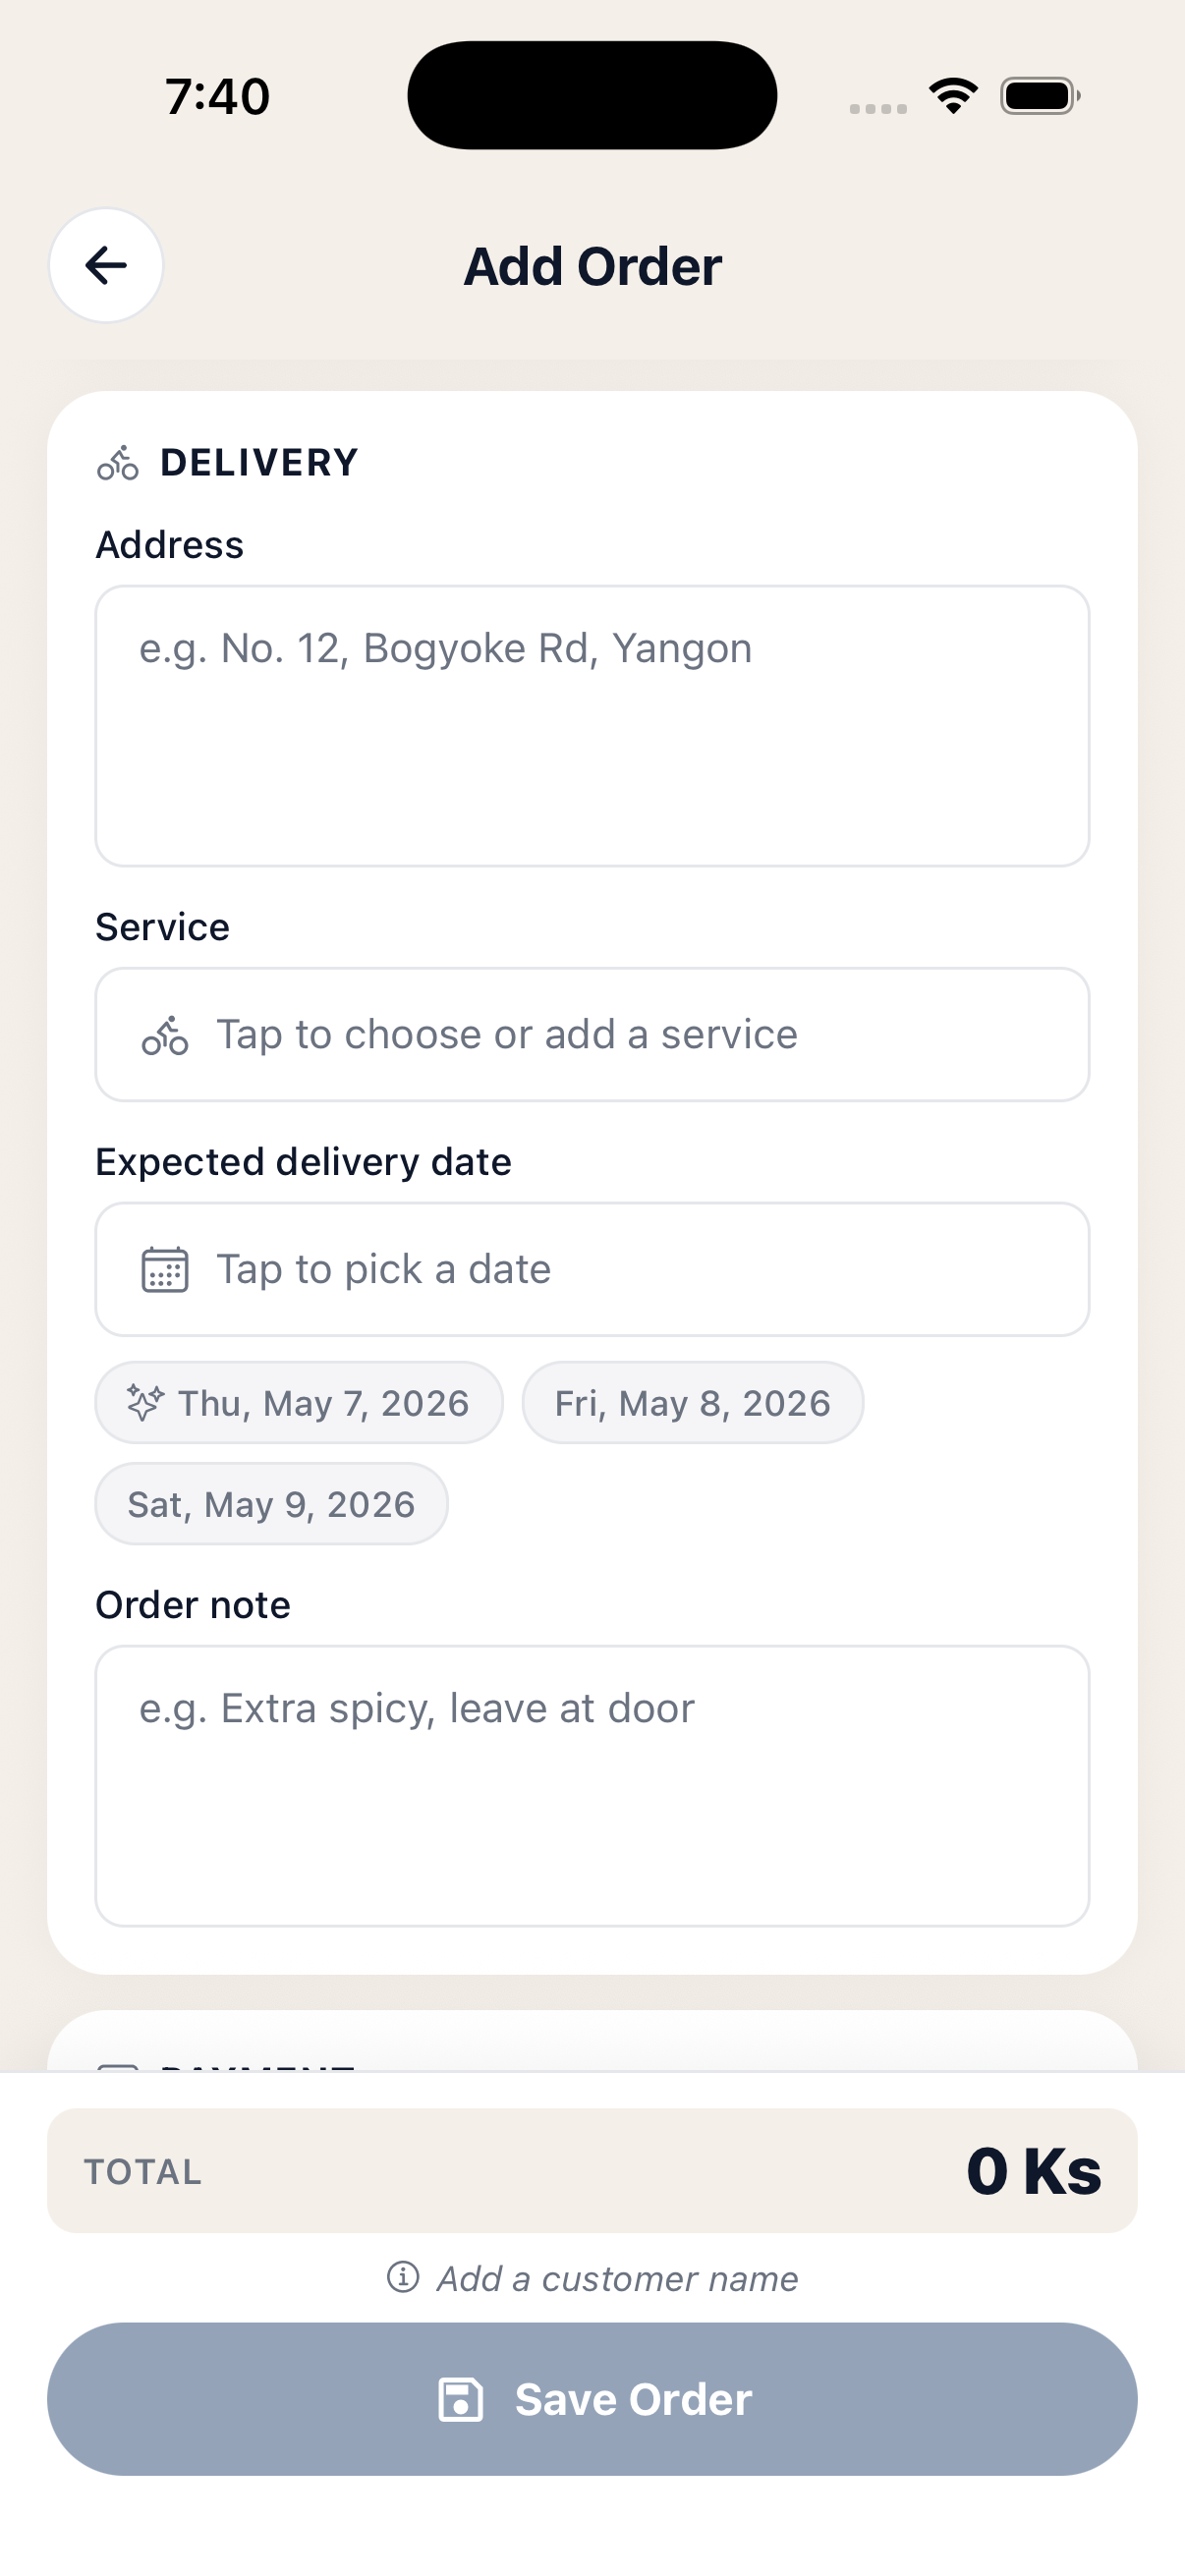
The Delivery section is where you say where it's going, when, and with whom:
- Address — the customer's delivery address. If the order is linked to a saved customer, this carries forward to their record.
- Service — pick the courier from a sheet (e.g. Aramex, Ninja Van, Royal Express). Type a new name and tap Add to create one on the fly.
- Expected delivery date — tap to open the date picker, or use the three suggested chips (today + 2, 3 and 4 days). The first chip has a sparkle icon to show it's the most likely default.
- Order note — anything the courier or you should remember (e.g. "Leave at door", "Call before arriving").
An expected date is optional, but recommended — it's what powers the overdue warning on the order list and the Expected row in the timeline.
 Delivery section with date suggestions
Payment, discount & fees
Pick how this order will be paid using the two big buttons:
- Cash on Delivery — the courier collects cash from the customer and pays you out later.
- Paid — the customer has already paid (e.g. by mobile wallet or bank transfer). When you choose this, a Paid via picker appears so you can record the channel — KBZ Pay, AYA Bank, etc. You can add new channels right from the picker.
Once an order moves into the payment lifecycle (e.g. cash collected, settled), the type is locked so the records stay consistent. The app shows a small note when this happens.
Below that, the Charges card lets you tweak the total:
- Discount — toggle between Ks (a flat amount) and % (a percentage of subtotal). The percentage mode shows the resolved kyat value as a hint, and any over-the-subtotal amount is automatically capped.
- Delivery fee — what the customer pays for shipping, on top of the items.
When you're done, the footer at the bottom shows the Total with a small breakdown (subtotal − discount + delivery). Tap Save Order to write it up. If anything's missing — customer name, items, or a payment channel for paid orders — you'll see a friendly note above the button explaining exactly what to fix.
 Payment type, discount and delivery fee
Track and update an order
Tap any card from the orders list to open Order Detail. At the top you'll see the customer (tap to jump to their profile), the total, payment type, delivery service and the full list of items. Below that sits the timeline — the heart of the screen.
The timeline shows where the order is in its lifecycle. It looks slightly different for each payment type:
- Prepaid: Created → Payment → Delivery.
- Cash on Delivery: Created → Delivered (cash collected) → Settled (when the courier pays you out).
Tap any row to move the order to that stage. The app will ask for confirmation — and if you're moving back (e.g. from Delivered to Paid) it warns you that timestamps will be cleared. The big green Mark as Paid and blue Mark as Delivered buttons below the timeline do the same thing in one tap.
Don't want to open the order? From the list, swipe right on a card to advance it through the lifecycle without leaving the page.
Tip: Once a COD order is delivered, it lands in the Awaiting Payout tab automatically. After the courier pays you out and you settle it, the order shows a blue banner at the top of its detail screen — tap it to see the settlement.
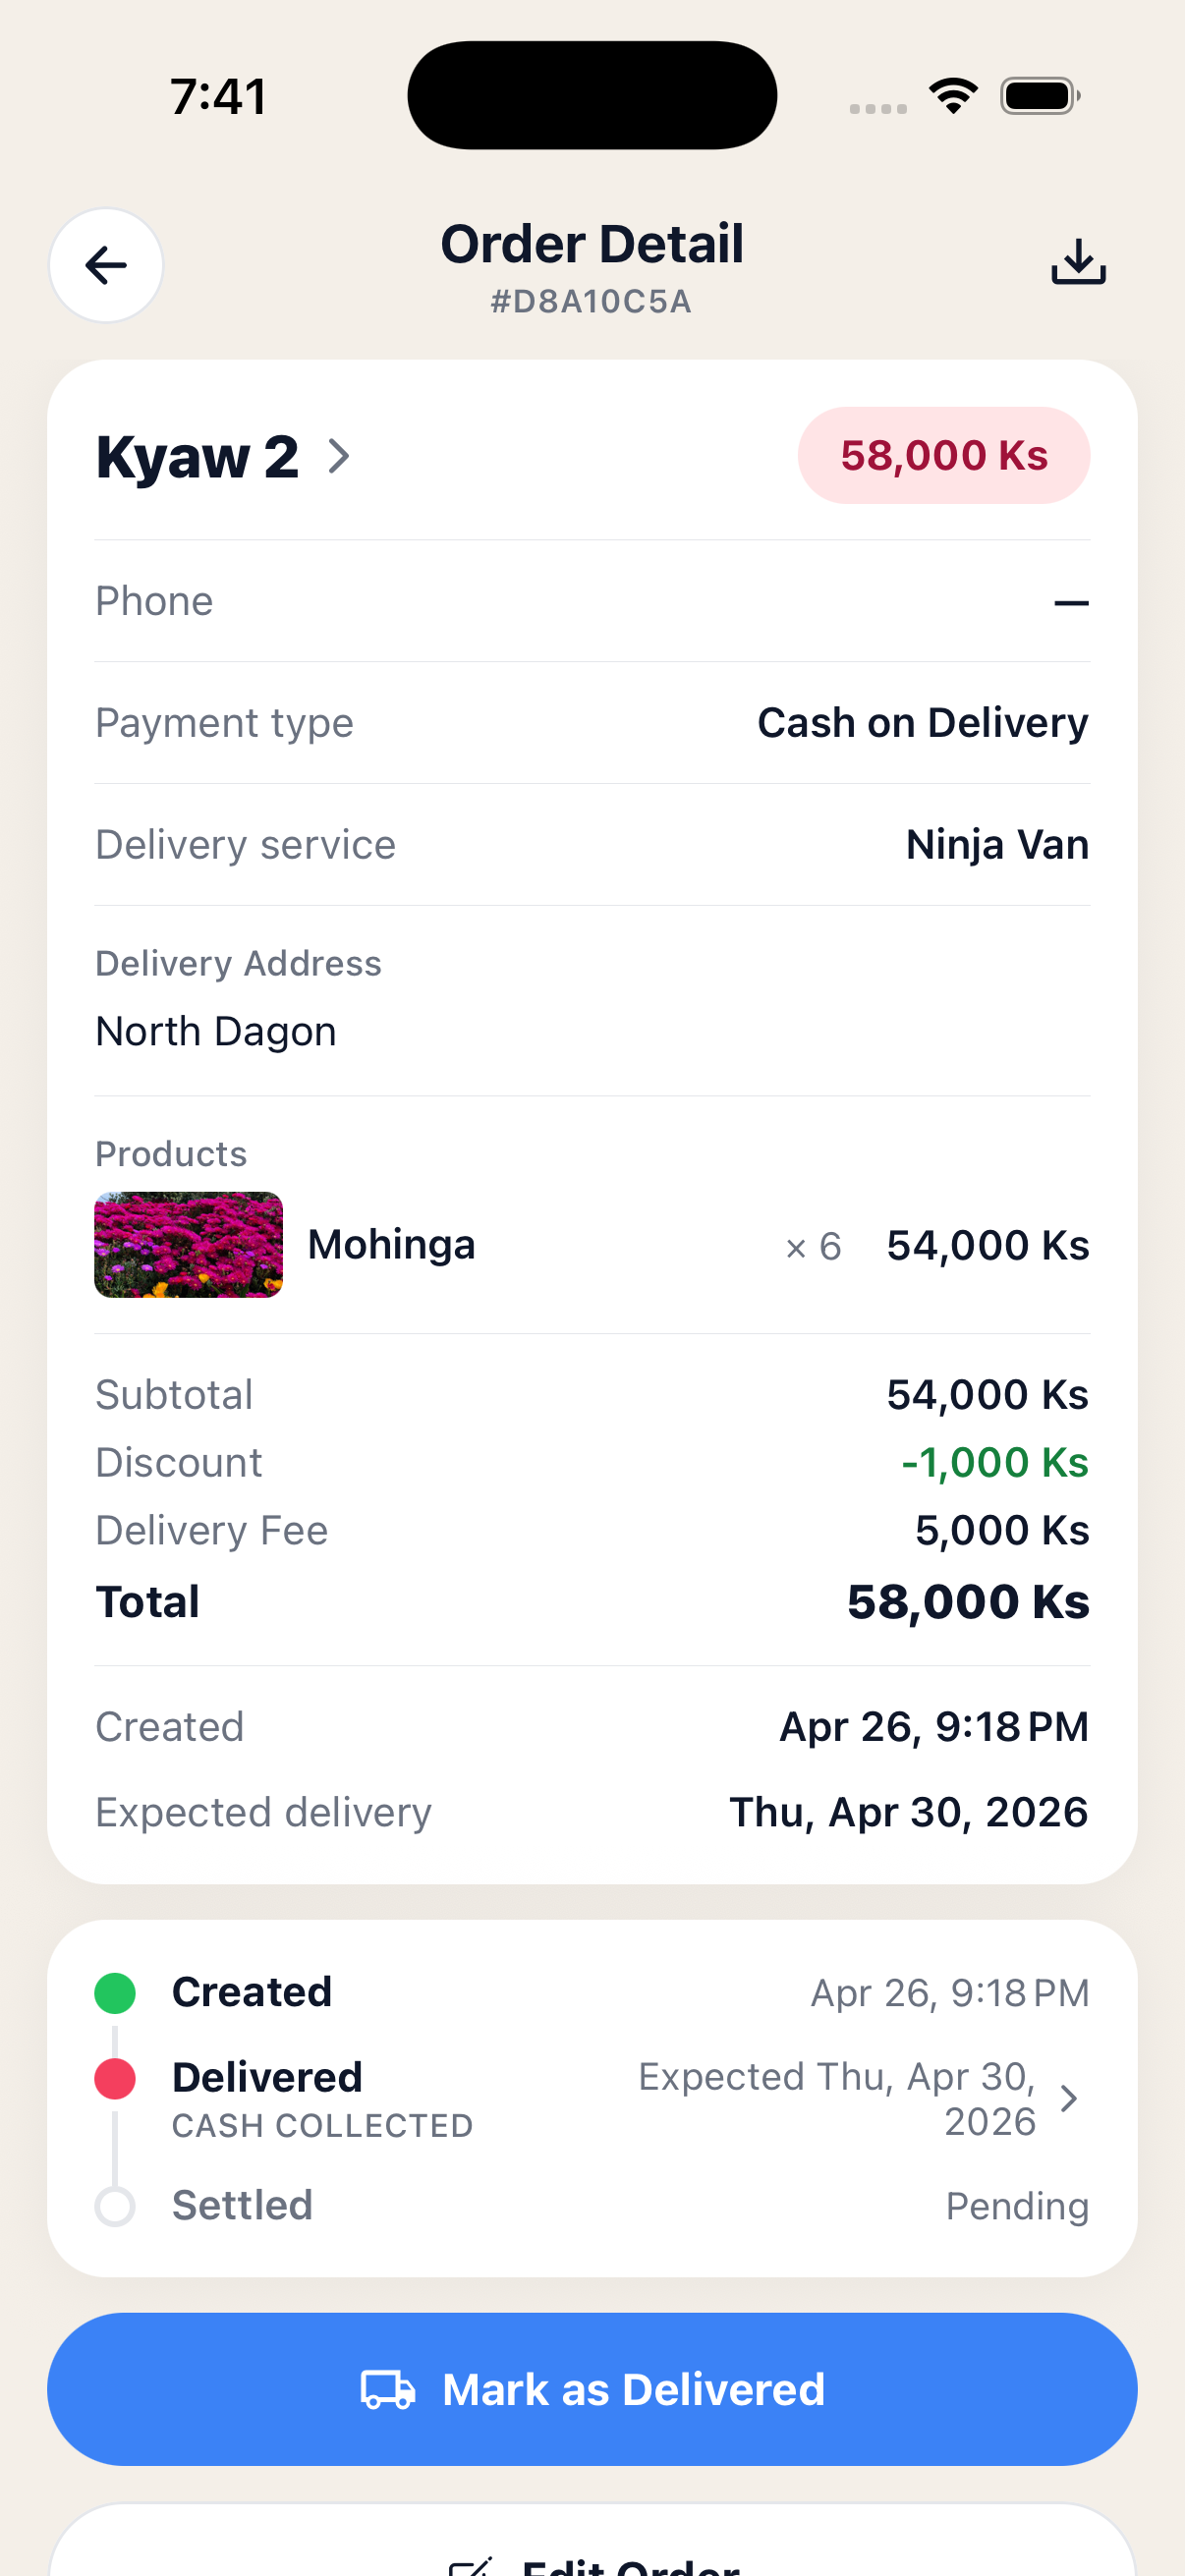 Order Detail with COD timeline
Edit, return & export receipt
A few more things you can do from Order Detail:
- Edit Order — opens the same form you used to create it. Customer, items, delivery, payment and charges can all be tweaked. Items already linked to a catalog product stay locked (only quantity is editable).
- Mark Returned (COD only) — for delivered orders where the courier brings the goods back. You'll be asked for an optional reason. The stock count for any tracked products goes back up automatically.
- Delete Order — removes the order entirely. There's a confirmation step because this can't be undone.
- Export receipt — tap the download icon at the top right. The app saves a clean receipt image (with your store name and logo, items, totals and status) to your phone's Order Notebook photo album, ready to share on Messenger or print.
Once a COD order is part of a courier settlement, Edit and Delete are locked — remove it from the settlement first if you really need to change it. This keeps your payouts and your orders consistent.
Edit Order — same form as Add
 Receipt saved to your gallery
That's it!
You've now created an order, set its delivery and payment, tracked it through the timeline, and exported a receipt. If something here doesn't match what you see in the app, message us on our Facebook page — we'll update the guide.
← Back to all tutorials